How To Make Feast Restaurant’s Vision Beta Cocktail

In this series, Logan Rodriguez, the bar manager at Feast, a restaurant in New York City’s East Village neighborhood, shows us how to make five of the bar’s most unique cocktails.
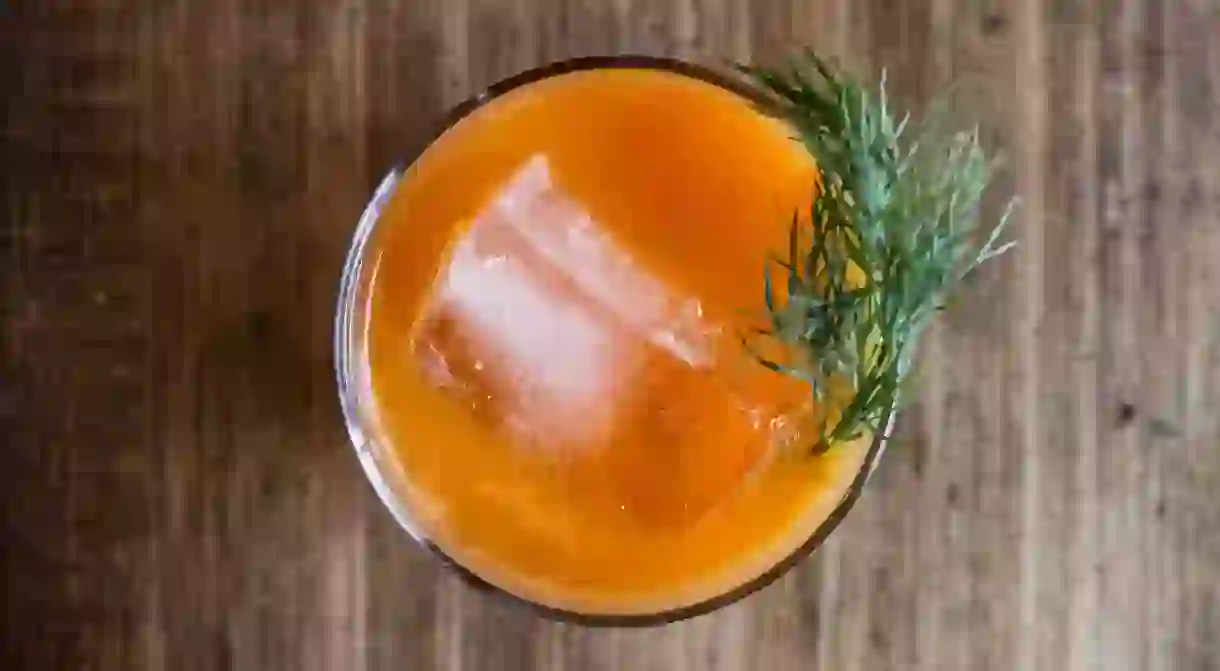
Here, we learn how to make the Vision Beta cocktail. Inspired by a dish of turmeric carrots made by a friend, Rodriguez gave himself the challenge of turning it into a cocktail that didn’t pull back from either the turmeric or carrot flavors. And although the notion of making the infused gin might seem intimidating at first, Rodriguez talks you though the process to make it as foolproof as possible.
Vision Beta
1.5 oz Rapid Turmeric Plymouth gin (see below)
1 oz freshly juiced carrot juice
.25 oz lemon juice
.5 oz Genepy des Alpes
1 tsp salted ume 2:1 (see below) or use .25 oz if you prefer a richer, lingering sweetness
Shake and serve in a rocks glass, preferably with a two-inch cube. Alternatively, can be served up in a coupe.
Garnish with a single sprig of dill.
Salted ume 2:1
2 cups white sugar
1 cup water
.25 oz salted umeboshi vinegar (Eden Foods brand)
1. Set water on heat to near-boiling.
2. Add in the sugar and stir thoroughly until dissolved and nearly clear.
3. Take off heat, and allow to cool to room temperature.
4. Add the umeboshi vinegar to the syrup, and stir or shake thoroughly to incorporate.
(Keeps, refrigerated, for at least three months)
Rapid Turmeric-infused Plymouth
Rodriguez explains:
What is rapid infusion? Before going into detail, it might be worth noting that you don’t have to use a “rapid” pressure-based technique to infuse turmeric. However, it is recommended due to the strong bitter flavors that often come along with a traditional turmeric infusion.
A rapid infusion is an infusion that uses a method outside of prolonged exposure in order to extract the flavors from the infused substance. The method in this case is applying increased atmospheric pressure into a chamber containing all the ingredients, which forces the liquid into the porous structures within the infused ingredient, speeding up an infusion process that might take days or even weeks, depending on the ingredient. The advantage to this aside from saving time is that some ingredients provide unwanted flavors in the course of time that it takes for the desired flavor notes to “transfer.” In a rapid infusion, you can avoid these bitter or undesirable flavors by reducing exposure time. On the other hand, that isn’t to say that rapid infusion is better- it’s just a different technique, which can yield better results depending on what ingredients you’re using or what flavors you’re trying to extract.
By all means, you can use the quantities of this recipe and slow infuse and might achieve satisfactory results, but for my palate this process yields an infusion that is bright and subtle enough that it can be mixed in a variety of contexts or even drank straight. My slow infusion results cannot be given the same judgment.
This component requires a little bit of equipment that most people aren’t likely to have at home, but if you are willing to make a modest investment, you’ll be able to do rapid infusions of liquors and oils as well as foams/whips. I personally use an iSi Gourmet Whip 500ml that I’ve found a lot of use for.
For a complete reference, I’d highly recommend that you refer to the rapid infusion chapter in Liquid Intelligence by Dave Arnold, but I’ll summarize this recipe here as best I can (note: this recipe is in the book itself).
Also, for safety purposes, this recipe is only recommended for the iSi Gourmet Whip, as the infusion requires going slightly outside the recommended pressure parameters, which iSi has designed safeguards around.
You’ll need:
iSi Gourmet Whip 500ml
Rapid Infusion adapter (highly recommended, but not required)
500 ml of Plymouth Gin
100 g of fresh turmeric root (powder is not an option)
2 iSi N2O chargers
Once you have the equipment, it’s easier than it looks. Keep in mind that you’re dealing with high pressure, so take the care to make sure everything is sealed properly before beginning. Also, remember that turmeric stains dramatically.
1. Use a digital scale to measure out 100 grams of fresh turmeric root. WEAR GLOVES and slice the turmeric root into ~2 mm slices on a cutting board that you have preferably wrapped in cling wrap to prevent staining. Put the sliced root into the iSi canister.
2. Measure out 500 ml of Plymouth. Pour into the iSi canister.
3. Attach the trigger cap, and make sure the rapid infusion filter and adapter are attached if you have the kit (with a cup to catch vented liquid). Otherwise, you’ll want a bowl and a glass to catch the liquid that vents out of the standard iSi spout when you release the pressure.
4. With everything tightly sealed, take one N2O charger, place it in the chamber and screw it onto the canister. You’ll hear the pressurization happening. Give it a gentle shake or two and unscrew the charger chamber (you will hear a little bit of pressure release). Load the second charger and repeat the process, but this time let the infusion sit for 2 minutes and 30 seconds (as close to exact as possible). Shake the canister gently every 20 seconds or so.
5. When the time is up, make sure you have a large cup/bowl/whatever works to catch the venting liquid. With the rapid infusion adaptor, this is very easy: just place a measuring cup under the curved spout and pull the trigger until all the pressure is released (along with a bit of liquid). If you don’t have the adapter, you’ll want to have the normal whip tip attached. Hold a glass upside down over the spout and hold the canister upright over a catch bowl. The vented liquid will shoot upward and hit the bottom of the glass, and then cascade down into the bowl.
6. Unscrew the trigger cap on the iSi canister and let the liquid/turmeric mixture sit for about 5 to 10 minutes (you can hear a fizzing; this is the sound of N2O escaping the turmeric and pulling flavor out with it into the mixture). Keep the overflow liquid from the venting—you’ll mix this with the final result.
7. Drain the canister through a mesh filter into a large container. With gloves, press on the turmeric root firmly to get a modicum of liquid that might not have escaped during the initial infusion. Add the liquid from the initial pressure release into this.
8. Finally, strain the whole mixture through a fine mesh filter, a micro sieve bag or a coffee filter to remove extra particles. This may seem superfluous, but after a short time small bits of turmeric will add a surprising amount of bitterness to the infusion. I use a nylon mesh nut milk bag. Ideally, let the strained mixture rest for about 10 minutes before using.
[jwplayer 8EBgBOco]

About the author

Kathryn has eaten her way around the globe, seeking out local delicacies in more than 40 countries and counting. After receiving a Master's degree from the Columbia University Graduate School of Journalism, she began writing about travel, food, and drink, and has held editorial roles at luxury publications including Conde Nast Traveler and the Robb Report. When she's in NYC, she can generally be found on a barstool at one of the city's best cocktail bars or at home sipping fine wine with her cat on her lap.
Read Next

37 Must-Visit Attractions in the United States

The Most Iconic Landmarks in SoHo, New York

Where To See Georgia O'Keeffe's Art

The USA's 10 Best History Museums

8 Things To Do in NYC at Night for Non-Drinkers

From Denver to Moab on the Rocky Mountaineer

The Best Places to Visit in the Pacific Northwest

The USA’s Top 10 Modern Art Museums

15 Stunning Natural Wonders in Central America That Will Take Your Breath Away

The Best Private Museums to Visit in the USA

10 Things To Do And See Around NYC's Barclays Center

The Best Destinations for Ecotourism in the US
